![]()
![]()
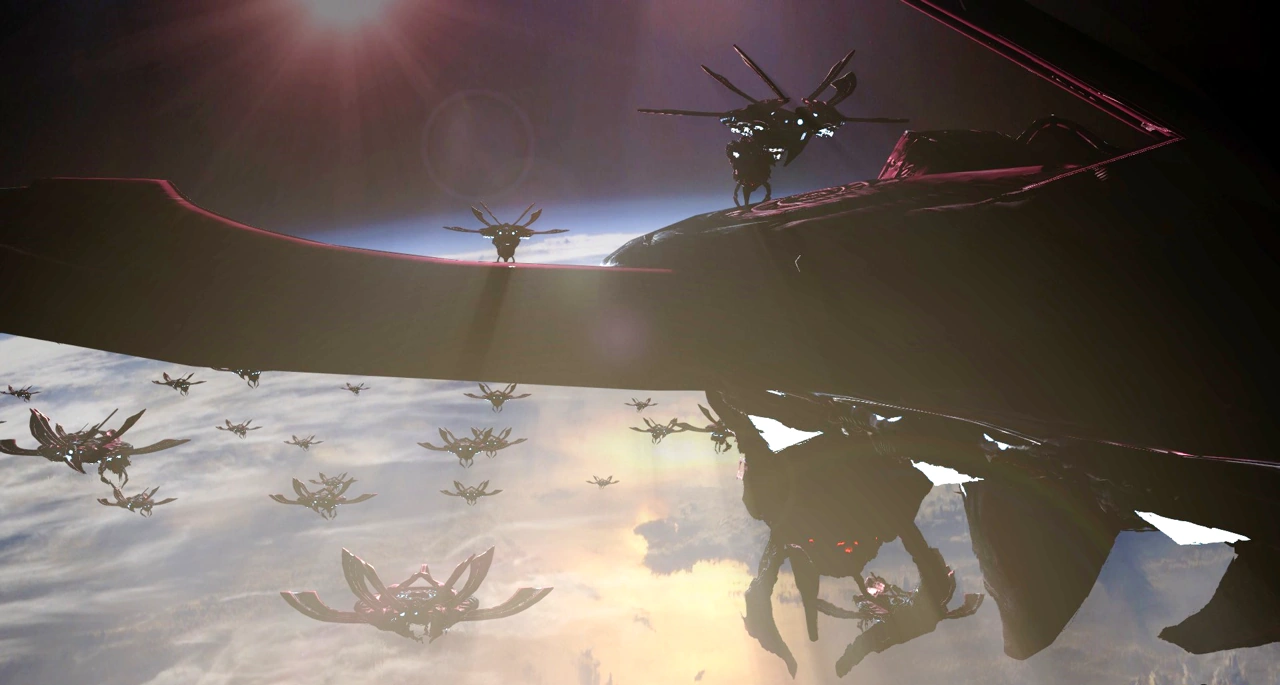
The Alcor Class Warship, often referred to as simply the Warship, is a large spacecraft that was used extensively during the Mental War, especially during the late days of the war on Earth. Tunguska Offensive.[1]
The warship is used by Mental for troop deployment and as a "ground-scorcher" with its powerful laser beams. The warship serves as a minor antagonist, and is fought as a boss twice throughout the Serious Sam 3: BFE campaign.
Overview[]
The warship is the most common spaceship seen in Mental's space fleet. The warship is equipped with on-board AI that allows it to move around, which suggests it's controlled automatically.[2] The ship can travel from one location to another with minimal effort thanks to its propulsion system; this system is capable of transporting the ship vast distances up to the speed of light, allowing it to travel as far as 10 parsecs (approximately 32.6 light years) in one transdimensional jump.[3]
The warship is extremely durable due to its heavy armor plating and can withstand anything up to a strategic missile. The ship's deployment hatches, however, have very thin armor, which can allow someone to damage it from the ground. Each hatch can only sustain a certain amount of damage before automatically closing. The amount of hatches opened appears to be based on the damage the warship has sustained, opening the most hatches when it is nearly destroyed.
Each warship is capable of holding up to a maximum of 20,000 troops.[3] The troops are deployed onto the ground with the use of teleport beams, which are activated immediately after the deployement hatches open. Said hatches are located on the underside of the ship. When each hatch is opened, a teleport beam will spawn various enemies in different areas. At first, only light troops (Beheaded Rocketeers, Gnaars, Hatchling Antaresian Spiders, etc) will spawn. As the warship takes more damage, tougher and more challenging enemies are deployed onto the battlefield.
If the ship has suffered significant damage and its on-board AI senses that the ship is in imminent destruction, the warship will retreat via a short-range jump before it can be destroyed.[2] However, if the ship has been too greatly damaged, it will crash even after attempting a propulsion jump.[4]
Application[]

A fleet of warships were deployed as part of Mental's invasion force during the Mental War.
Used extensively throughout the late stages of the Mental War on Earth, the warship is the most commonly seen spacecraft used by Mental. They were used primarily for wreaking havoc upon major cities across the world with its scorcher beams and deploying mass hordes of troops into areas where they were needed.[1]
Appearances[]
At least a hundred warships are seen invading Earth in the opening cutscene. Several of them ars seen later, on the planet itself, destroying buildings in the background of an unknown city with their scorcher beams, while Mental's forces seize control of the area.[1]
The first warship in-game appears in the first level of the campaign, Summer in Cairo, where it can be seen destorying an entire building with its scorcher beam before "jumping" away using its propulsion system. Later on, the player encounters it in two levels as a boss: Under the Iron Cloud and The Power of the Underworld.
Weaponry[]

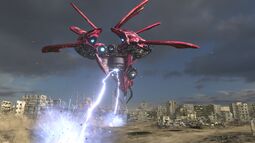
A warship firing its scorcher beams.
The warship's armanent is limited to several scorcher beams, which are fired from the center of the ship's underside. Despite being equipped with weapons, the warship is not capable of complicated maneuvers or attacks. The scorcher beams are strong enough to cut through steel plating at a rate of one foot per second.[2] Depending on the damage taken, the warship can multiply the amount of laser beams, allowing for a maximum of three beams to scorch the nearby area. These beams will instantly kill the player or any enemy should they come into contact with them. This can occur regardless of the difficulty setting and the amount of health/armor the player or enemy has.
Tactics[]
- The deadly scorcher beams fired by the warship are easy to dodge as long as the player is constantly moving. It also helps to see where the ship is firing its beams to reduce the chances of death.
- If possible, try to aim at the closest weak point. Weak spots closer to the player are larger, giving them more room to hit the weak spots than trying to hit farther-away ones would.
- The player should be aware of their surroundings during the fight, as it is very important while fighting this boss. Accidentally being cornered can easily get the player killed depending on the types of enemies that are spawned.
- Both battles have ammo crates filled with an infinite amount of rockets scattered throughout the arenas they take place in. If the player runs low on explosives, it is highly recommended that the player finds and open a nearby crate as soon as they can.
- One cannonball can instantly destroy one of its spawn ports, which makes it a great weapon to use against it.
Fight 1[]
- The XPML21 Rocket Launcher will do better damage to the warship than most currently available weapons, but the rockets also take sometime to hit each hatch. Be sure to shoot the hatch that is closest to avoid missing any shots.
- The rocket launcher is also a good choice for dealing with the hordes of enemies that the warship teleports, as long as they aren't close to the player. One rocket can kill most enemy types spawned by the warship except for Sirian Werebulls.
- It's usually a good idea for the player to aim rockets towards the ground near the enemy the player is targeting. That way, fast moving enemies like Beheaded Kamikazes or Kleers will be easier to hit with the splash damage and be killed easily.
- Enemies at close range should be dealt with by using either the Double Barrel Coach Gun or M29 Infantry Assault Rifle. The player should also use the XL2 Lasergun if they have enough ammo to spare.
- The assault rifle is also handy for taking out long-distance enemies that could be a problem later, such as Kleers. If the warship is also too far away to hit with rockets accurately, it can also damage the warship when shooting the hatches.
- Try to balance it so that equal time is spent between hitting the weak points and controlling enemy hordes spawned by it. Letting enemy crowds become too large makes it more difficult to concentrate on the warship.
- If the player has picked up the lasergun, it can do significantly more damage than the assault rifle and doesn't need reloading, making it also a good choice.
- If the SBC Cannon was collected during the course of the level, it may be a good choice to use it, as each successful shot will do massive damage to the warship. One must also keep in mind that spare cannonballs are rare at this point of the game, so the player will have to aim carefully to avoid missing. Remember that the cannon's projectile descends with gravity, so be sure to use appropriate aim compensation to ensure each cannonball hits.
- Letting the warship stay for too long at low health with eventually cause it to populate the ground with Werebulls, which can complicate the situation and may force the player to use precious cannonballs.
Fight 2[]
- The cannon is the player's best friend during this fight; a fully charged shot on an open hatch will do massive damage to the warship. It will only take about six fully charged shots to completely destroy the warship, and since cannonballs are more readily available at this point in the game, it should be favoured over other weapons during this fight. The usage of this weapon alone can shorten the entire duration of the battle significantly, even before the warship can spawn excessive amounts of enemies on the battlefield. Remember that the cannon's projectile descends with gravity, so be sure to use appropriate aim compensation to ensure each cannonball hits.
- The AS-24 Devastator is a good alternative for hitting the warship's weak points in the second fight. Devastator grenades are much faster than the rocket launcher's rockets, allowing the player to inflict damage quicker than in the first fight.
- If overwhelmed, C-4 Demolition Charges the cannon and XM214-A Minigun are excellent weapons to use against the hordes spawned by the warship. Charged up cannon shots are very useful against the stronger enemy types teleported in (like the Scrapjack), while the C-4 and minigun can clear out the weaker enemy types that teleport in (like the Juvenile Antaresian Spider).
- The biggest threat spawned in by the warship is the Scrapjack because of all the projectiles they fire. Take them out as soon as possible in order to get more room to dodge attacks.
- When playing on co-op, the player will not be able to damage the warship from the Vista secret spot (which has a sniper rifle), even though it doesn't look like anything is obstructing the player's shot.
Related achievements[]
Serious Sam 3: BFE[]

|
| ||
| Defeat the spaceship. |
Serious Sam Fusion[]

|
| |
| Defeat the spaceship. |
Serious Sam 3 VR: BFE[]

|
| |
| Defeat the spaceship. |
Behind the scenes[]
- In the first level of the game, the ship's model disappears as it flies away, but its health can still be seen with the player's crosshairs if they look into the sky where the ship disappeared. This is likely a developer oversight.
- The achievement "All Your Base Are Belong To Us!" is actually a dialog from the 1989 scrolling shooter arcade game Zero Wing. Later, it become an internet phenomena. Sam also says the words when he taunts the warship after the first fight.
Trivia[]
- In the Serious Sam Fusion version of Serious Sam 3, the warship boss fight in The Power of the Underworld reuses the boss fight theme during the Adult Arachnoid fight in Into the Spider's Nest.
- The warship does not appear in Serious Sam 4, despite being set during the Mental War. They were probably deployed so Mental could use them as part of a scorched earth policy instead of harvesting the human population like he did during the Tunguska Offensive.
- The warship has a noticeable "shimmering" effect underneath its engines. This can be seen more clearly in the Serious Editor and when viewing it in NETRICSA.
Gallery[]
")
")
")
")
")
")
")
")
")
List of appearances[]
- Serious Sam 3: BFE (First appearance)
- Serious Sam 3 VR: BFE (non-canonical appearance)
References[]
| |||||||||||||||||||||||||||||